|
SoCoder -> Article Home -> Graphics 3D |
|
|
|
|
Toaster
|
Bump MappingBump Mapping in Blitz3D |
|
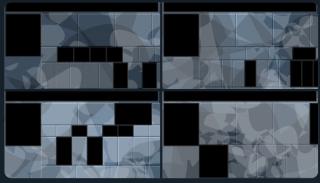
Bump mapping is a method of creating highly detailed meshes at low poly count. The effect can easily be achieved in blitz3D using cubemaps. This effect however is only static; to update bump maps requires shaders since it's too slow otherwise. Below I have two images, one is a normal mesh (not bump mapped) and the next is an image of a bump mapped mesh. Normal Mesh:  Bump Mapped Mesh:  First off, you need to understand what bump maps are and how they create the effect. The easiest way to understand how they work is to think of a 3D looking painting, a drawing that looks like 3D but in actuality is flat. Bump mapping is an illusion, it's like drawing a 3D box on paper -- the box may look 3D but it's flat. There are three different channels of color in your bump map image: red, green, and blue. Each different color represents a height. Now, how do you make a bump map? Well, there are several methods of making a bump map. One of the quickest ways is to download crazy bump, or the nVidia tools. You can of course draw your own, but don't expect it to look great  Crazy Bump Nvidia Tools What you do, is that you load your texture into the program and export the bump map. It's really easy, but you'll have to play around with the different settings until you get the right look. On to the programming part of bump mapping, we first want to start by loading our model and texture in a special way. This loads the mesh and grabs the texture off the mesh. It also sets the texture's blending mode to 2 ("multiply"). You can optionally just load the texture with the load texture command, but this way is good for editors  Next, you will need to make your initialization bump function. I'll try to explain this best I can. Basically, this code sets up several textures. First off, you create your lightbox. This is similar to a sky box, except you'll never see it. The code is the same for setting up the skybox as it is with the lightbox. I have a lightbox which I am giving away for free. You can download it here. The light box is your reference to the bump map -- think of it as your decoder key This loads your bump reference texture. Try to not get this confused with your lightbox. Download here. You will also need to set this texture's blend mode to 2. Next, you create an ambient texture. And create your light texture... You set this texture's cube mode to 2, diffuse blending mode. Then, you create your reflective texture. You set this cube's blending to 1, which is specular blending. We won't be using this texture in this tutorial but it's for specular mapping Now you'll want to render your lighting/bump mapping... Here's the light rendering function: Okay, there's a lot of stuff here, so I will try to explain it all at once, simply Basically, you create another camera and then render your lighting/bump map to it, thus creating your final textures. I don't have time to go into what every little detail does, I hope that you can understand it on your own though. Maybe you can even make improvements to it Okay, now here's what you do to texture your mesh. I am going to include the loading mesh part so you can see how it all ties together You don't even have to render anything in your main loop, because it's all pre-loaded. However, you can change the textures and reapply them (just reset the textures and call the RenderLight() stuff again) but you'll have to do it for each mesh and this can become slow  I hope this helps to add detail at no cost in performance. If you need any help, just ask me by sending me a PM. Note: I did not write the Initbump or the RenderLight functions (I have no clue who did.) Just to make sure I don't get yelled at, I am saying that I didn't write them! Here's all the code, rolled up into one big jumbled mess. willhostforfood.com/users/toasterthegamer/bumpmapping.bb -Toaster Special thanks to Phoenix for editing the grammar. |
|
|
|
|
Comments |
|
| Saturday, 09 February 2008, 13:45 | |
Scherererer
|
Great contribution, Toaster! I know that people are always looking for ways to do cutting-edge effects like this!
|
| Sunday, 10 February 2008, 02:01 | |
HoboBen
|
Thanks Toaster - this will help me a lot Now that I have a graphics card I can try this sort of stuff
|
| Sunday, 10 February 2008, 04:08 | |
power mousey
|
@Toaster, the first barrel looks more realistic. I don't like the looks of the second barrel...looks too artificial. Do the bump mappings affect the over all model and especially the textures. Will it require more high end system specs for performance and speed? CHow much can Blitz 3d handle with bump maps on these low poly models? I mean: how many low poly models can you render with bump maps before a drop in performance...if any? Thanks for the fish, 
|
| Sunday, 10 February 2008, 06:40 | |
|
Toaster |
for real time bump mapping you would have to have a good GFX card/CPU but this isnt realtime so its super fast just about any card can run this. My integrated geforce 2 MX did this fine.. Theres no drop in performance at all. Its all preloading I guess you might get a small drop if you don't have a lot of ram or video memory. I haven't tested on a computer with 64 mb's or less video memory. Oh and if you didnt notice it lights the mesh better you can not use the bump texture and still have the lighting.
|
| Sunday, 10 February 2008, 13:00 | |
|
power mousey
|
no, I didn't really notice. Again, the second barrel looks oddly shaped. It looks slightly disoriented. It takes a few seconds...well for me, that is..to register that this thing or object represents a barrel. Weird and odd shaped it is. But I guess barrels come in all shapes and sizes...and colors too. Probably a deformed barrel. Too much toxic acids eating up and corroding the material of the barrel. |
| Sunday, 10 February 2008, 14:07 | |
|
Toaster |
Yeah its suppose to be dented and rusty.. Its not one of my best meshes..
|
| Sunday, 10 February 2008, 14:18 | |
|
power mousey
|
okay, duh! on me.  I now know and understand. Well now and okay, it look like a fine dented,rusty and corroded barrel.
|
| Tuesday, 23 February 2010, 13:14 | |
|
Slat |
HEyyy ahhh... The links are dead.. I really liked to get the file.. plzz |
| Tuesday, 23 February 2010, 13:18 | |
Jayenkai
|
Tsk. See, this is why we have uploads, here, people! If I can find an old copy of this, I'll try to dig out the bits for you. |
| Tuesday, 23 February 2010, 14:03 | |
|
Afr0 |
Why would you need the file? The code is already posted!! |
| Tuesday, 23 February 2010, 14:23 | |
|
Slat |
the files... I don't have the light box textures... and I wanted them to get a grasp on how light box textures should be, and so on... |
| Wednesday, 24 February 2010, 13:14 | |
|
Toaster |
hmm Sorry I haven't been on here in ages. I'm afraid I don't have the code anymore or the lightbox anymore. Around a year ago my HD failed and I had to get a new one. I lost a lot of my old work. I cant really remember what the lightbox was other then it had different colors. Mainly 3 colors Red, Green, and Blue that lerped between each other. It was important what face the colors were on too and I cant remember anymore. Anyways if you are trying to get bump mapping working in blitz3D I think there are some better options out now. I'd suggest checking around on the blitz3D forums. Another alternative is to switch to the engine I'm using Truevision3D and you can use VB.net or C# or a bunch of other languages. I think even blitzMax is supported by one of the community members. It has built in normal mapping and parallax mapping! BTW: Check out my TreeGen site: https://treegen.pipedreamgames.com/ -Toaster |
|
|
| |||
|
| ||||
Undock Sidebar
Log in
Register
Recent Uploads
spinal
angry dialog 01 test
spinal
angry dialog 01 test
spinal

glasses test
steve_ancell
IMG 202404 ... 104348 349
cyangames

snaphappy
Pakz
IMG 3178Spritegen
Pakz
IMG 0460Userint
spinal
nerdly error 1
spinal
blitz3d error array
Pakz
pixelArtPoster26x6
Log in
Register
Recent Uploads
spinal

angry dialog 01 test
spinal
angry dialog 01 test
spinal
glasses test
steve_ancell

IMG 202404 ... 104348 349
cyangames
snaphappy
Pakz
IMG 3178Spritegen
Pakz

IMG 0460Userint
spinal

nerdly error 1
spinal
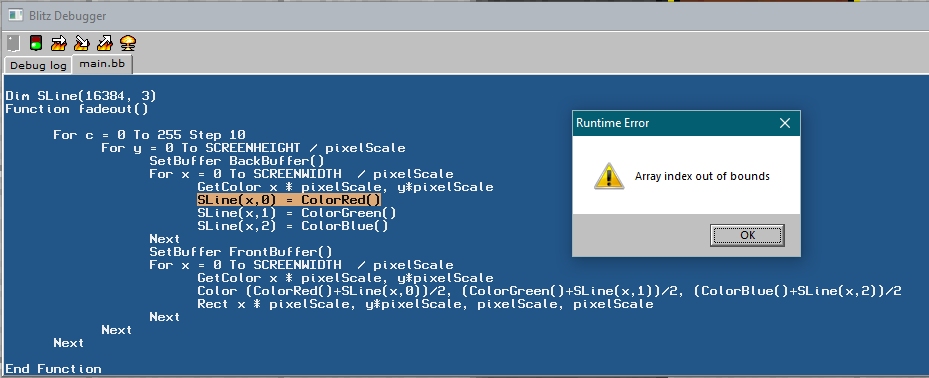
blitz3d error array
Pakz
pixelArtPoster26x6